Taking Screen Shots
Take a screenshot ( ) will take a capture of what you have on screen in two modes: automated selection to grab objects or click-and-drag for grabbing custom areas.
-
Position the object or objects you want to capture on the monitor.
-
Open Video Detailer, bring the program to the front [ALT + TAB] to scroll programs or press [CTRL + F2].
-
Position the timeline indicator in the position where you want the capture to be inserted into the timeline.
-
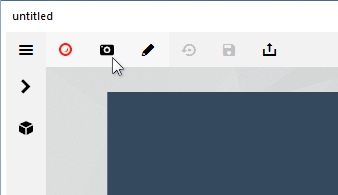
Click the Take Screen Shot button ( ) to activate screen shot mode. The Video Detailer interface will minimize and a crosshair will appear on screen.
-
Move the crosshair into position. This is somewhat different depending on whether you want to accomplish an auto-selected area or a custom area
-
Auto-selected. As you move the cursor over the landscape of the display, Video Detailer will actively select areas of the screen (e.g., applications, panels and menus) based on the position of the cross-hairs. The selected areas will be shown by a red frame. When the desired area is highlighted click the mouse to capture the screen.
NOTE: it may take a little practice to position the crosshair the first time. You may need to scroll to various positions over the object.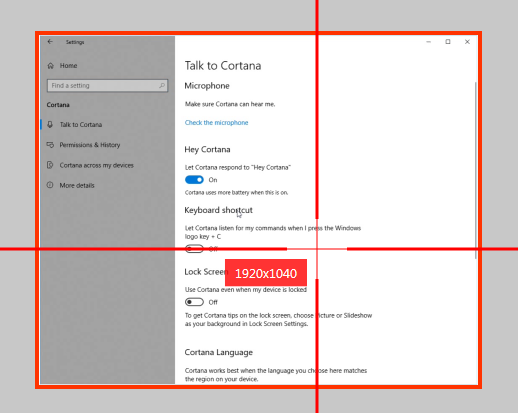
Figure 2: The auto-select method showing the position of the crosshair and object frame. -
Custom selection. Move the cursor over the image to position the crosshairs over the image at any corner of the imaginary box you would like to capture. Click-and-drag over the area you would like to capture. This will create a red frame over the area where you drag. When you release the mouse the framed area will be captured.
NOTE: The shape of the capture can later be masked to other shapes with object FX options.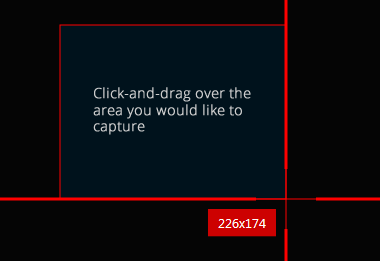
Figure 3: A custom selection made by click-and-drag.
-
-
On capture by either method, the capture will be inserted into the timeline at the position of the timeline indicator as set in step 3.